When it comes to finishing the walls of your home, plastering is one of the most popular and effective techniques. Plastering not only gives your walls a smooth and polished appearance but also serves as an essential protective layer.
Whether you’re renovating your home or building from scratch, understanding plastering is crucial for achieving a flawless finish.
In this article, we will explore everything you need to know about plastering walls, including the standard methods, types of plaster, and the process involved. By the end, you’ll have a better understanding of how to achieve the best results for your project.
What Is The Standard Plastering For Walls?
Standard plastering for walls is a technique used to cover and finish the surface of interior walls, providing a smooth and durable finish.
The process involves applying a plaster coat to walls, which is usually a combination of gypsum, lime, and sand. This coat is then smoothed to provide a uniform surface that can be painted, wallpapered, or left as-is.
The standard plastering technique for walls includes a few key steps:
- Preparation: The first step in plastering a wall is to prepare the surface. This involves cleaning the wall, removing dust and debris, and repairing any cracks or holes. For new construction, this may also include ensuring the wall is sufficiently dry and free from moisture.
- Bonding Agent: Before applying plaster, a bonding agent is often applied to the wall to ensure the plaster adheres properly. This agent helps the plaster grip the surface and prevents cracking.
- First Coat (Base Coat): The first layer of plaster is typically a rough coat designed to create a base for the final, smoother layers. This base coat is usually thicker and is spread evenly over the surface of the wall.
- Second Coat (Finish Coat): After the base coat has dried, a second, thinner layer of plaster is applied. This coat is smoother and more refined, and it helps to create the final finish on the wall.
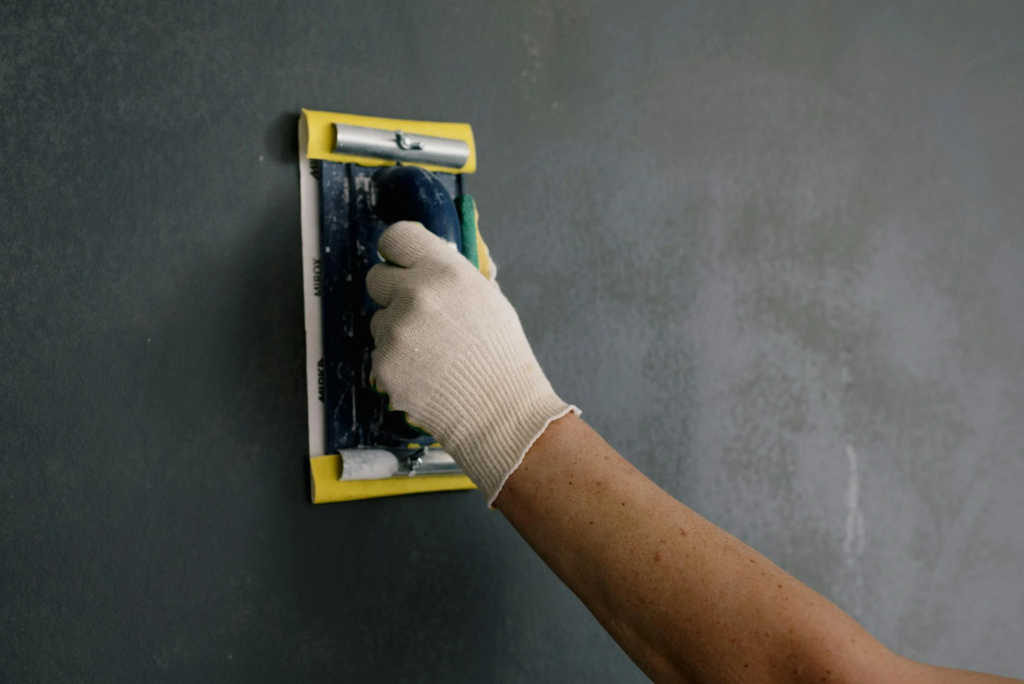
- Smoothing: Once the finish coat has been applied, it is smoothed using a trowel. This step is crucial for achieving a flat, even surface that is free from imperfections. The smoother the surface, the better the final appearance.
- Curing: After the plaster has been applied and smoothed, it needs time to dry and cure. This is an important part of the process, as the curing time allows the plaster to harden and strengthen. It’s essential to give the plaster adequate time to cure before painting or applying any finishing touches.
The standard plastering method has been used for centuries and remains a popular choice for homeowners due to its durability and versatility.
Different Types Of Plasters Used For Walls
While the standard plastering process involves gypsum-based plaster, different types of plaster can be used, depending on the project’s needs. Below are some of the most common types of plaster used for walls:
Gypsum Plaster
Gypsum plaster, also known as plaster of Paris, is one of the most commonly used types of plaster for interior walls. It’s made from natural gypsum rock, which is heated to produce a fine powder. When mixed with water, gypsum plaster forms a paste that can be applied to walls.
Gypsum plaster is easy to work with, dries quickly, and provides a smooth, durable finish. It’s also non-combustible and has excellent soundproofing qualities, making it ideal for residential and commercial applications.
Cement Plaster
Cement plaster is a mix of cement, sand, and water that’s applied to walls to create a hard, durable finish. It is often used for exterior walls or in areas that are exposed to high levels of moisture, such as bathrooms or kitchens.
Cement plaster is known for its strength and resistance to wear and tear, but it takes longer to dry compared to gypsum plaster. It also requires more skill to apply and may need additional coats to achieve a smooth finish.
Lime Plaster
Lime plaster is made from slaked lime, sand, and water. This type of plaster has been used for centuries, particularly in older buildings. Lime plaster has a more flexible finish compared to gypsum and cement plaster, making it ideal for older homes or structures that are prone to movement.
Lime plaster is also more breathable than other types of plaster, which helps reduce the risk of dampness and moisture buildup in walls. This makes it an excellent choice for historic restoration projects.
Clay Plaster
Clay plaster is a natural, eco-friendly option for wall finishes. It’s made from clay, sand, and water and can be applied in multiple layers. Clay plaster is breathable and helps regulate indoor humidity levels, making it a great choice for those who want an environmentally sustainable option.
While clay plaster is easy to apply and has a natural aesthetic, it may require more maintenance compared to other plaster types and is typically best suited for dry environments.
Step-By-Step Guide To Plastering Walls
Plastering may seem like a complex process, but with the right technique, you can achieve professional results even if you’re a beginner. Here’s a step-by-step guide to help you plaster your walls like a pro:
Step 1: Gather The Necessary Tools And Materials
Before you begin plastering, make sure you have all the necessary tools and materials, including:
- Plaster (gypsum, cement, or lime)
- Trowel and float
- Plastering brush or sponge
- Mixing bucket or drill with a mixing attachment
- Measuring tools (ruler, level)
- Protective clothing and gloves
Step 2: Prepare The Surface
Start by preparing the wall. Remove any loose paint, wallpaper, or debris. Clean the surface to remove dust, dirt, and grease. If there are any cracks or holes in the wall, fill them with a suitable filler and let it dry.
- For a better bond, apply a bonding agent to the wall. This helps the plaster adhere more effectively, especially if the surface is particularly smooth.
Step 3: Mix The Plaster
Carefully mix the plaster according to the manufacturer’s instructions. You’ll need to achieve the right consistency, similar to a thick cream. Don’t mix too much plaster at once, as it can harden before you have a chance to apply it.
Step 4: Apply The Base Coat
Start by applying the first, thicker coat of plaster using a trowel. Spread it evenly across the surface, starting from the top and working your way down. Use the trowel to smooth the plaster and fill in any imperfections.
- Allow this coat to dry until it’s firm but not completely set.
Step 5: Apply The Finish Coat
Once the base coat is dry, apply the finish coat. This layer should be thinner and smoother. Spread it evenly over the surface, using a trowel to smooth the finish. The goal is to achieve a flawless, uniform surface.
- Allow the finish coat to dry completely.
Step 6: Smooth The Surface
Once the plaster has dried, use a damp sponge or trowel to smooth out any imperfections. Take your time to ensure the surface is completely smooth, as this will affect the final appearance.
Step 7: Let The Plaster Cure
Finally, let the plaster cure for at least 24-48 hours, depending on the thickness of the plaster. This step is crucial for ensuring the plaster is completely hardened and won’t crack once the wall is painted.
Conclusion
Plastering walls is an essential skill for anyone looking to achieve a high-quality finish in their home renovation or new construction project. By understanding the different types of plaster and following the proper techniques, you can create walls that are not only aesthetically pleasing but also durable and long-lasting.
Whether you’re a DIY enthusiast or working with a professional, knowing the standard plastering process and avoiding common mistakes will ensure that your walls are flawless and ready for painting or decoration. With the right tools, patience, and skill, you can master the art of plastering and enjoy a beautiful, smooth finish for years to come.
Are you looking for more information? Click and check this link right here now!